Author Topic: (x) Wood Positioning  (Read 3204 times)

guitarbeau

  • club
  • Member
  • *
  • Posts: 80
Side mounted jack and LED switch
« Reply #90 on: March 16, 2007, 03:52:51 PM »
Bill,
 
I'm adding a boost switch to allow me to punch out of the mix when I need to. The pot will have a variable gain which I can access in the electronics compartment.
 
Michael

guitarbeau

  • club
  • Member
  • *
  • Posts: 80
Side mounted jack and LED switch
« Reply #91 on: March 16, 2007, 03:55:20 PM »
Forgot to mention that the boost is a clean boost.

lbpesq

  • club
  • Senior Member
  • *
  • Posts: 10683
Side mounted jack and LED switch
« Reply #92 on: March 16, 2007, 03:58:51 PM »
Sounds like a built-in stratoblaster.  What is the range of boost you can get?
 
Bill, tgo

guitarbeau

  • club
  • Member
  • *
  • Posts: 80
Side mounted jack and LED switch
« Reply #93 on: March 16, 2007, 04:54:26 PM »
I'm assuming that the range of boost is similar, if not identical to the stratoblaster.  
What do you think about the positioning of the boost switch?
 
I asked Mica to do the mock up above, but I'm considering putting the boost where the LED switch is. Thoughts??

mica

  • alembic
  • Senior Member
  • *
  • Posts: 10595
(x) Pickup inlay (skipping)
« Reply #94 on: January 03, 2007, 02:03:10 PM »
James finished the first couple of experiments with the inlay on the pickup. These were done on a cosmetic second MXY, but the material is the same (ABS plastic).   This was the unsuccessful cutting with a very sharp knife:

  Heating the inlay into the plastic makes a distorted surface, that can't be restored to the light texture:

  He's going to try another round with Tony with the polyurethane cast style of pickup. This is the kind without the gold name. I'll let you know when they've got that experiment completed.

mica

  • alembic
  • Senior Member
  • *
  • Posts: 10595
(x) Fingerboard Inlays
« Reply #95 on: October 06, 2006, 04:13:46 PM »
Hi Michael,  Here's the two kokopelli figures for the fingerboard:  


  We'll be assembling these with the rest of the details shortly.

guitarbeau

  • club
  • Member
  • *
  • Posts: 80
(x) Fingerboard Inlays
« Reply #96 on: October 09, 2006, 01:22:45 PM »
Mica, What do you think about morphing the most recent Kokopelli into what I'm including below?

guitarbeau

  • club
  • Member
  • *
  • Posts: 80
(x) Fingerboard Inlays
« Reply #97 on: October 09, 2006, 01:24:44 PM »

guitarbeau

  • club
  • Member
  • *
  • Posts: 80
(x) Fingerboard Inlays
« Reply #98 on: October 09, 2006, 01:27:02 PM »
Or coincidently (maybe not)
 

mica

  • alembic
  • Senior Member
  • *
  • Posts: 10595
(x) Fingerboard Inlays
« Reply #99 on: October 20, 2006, 01:32:31 PM »
Here's a couple of revisions of the lower Kokopelli. The first one is a little wider, and has closer to the stance of the one you liked:

  This one is a little more hunched over:

  Let me know which has more of the "feel" of what you're looking for, and I can start the final art and material mockup.

guitarbeau

  • club
  • Member
  • *
  • Posts: 80
(x) Fingerboard Inlays
« Reply #100 on: October 20, 2006, 04:43:35 PM »
Mica,
 
I love the top one. Let's go with him.
 
Thanks for the revision. This inlay is going to be sooooo cool!!
 
Michael

mica

  • alembic
  • Senior Member
  • *
  • Posts: 10595
(x) Fingerboard Inlays
« Reply #101 on: October 24, 2006, 05:16:26 PM »
Cool, glad you like him! I've got to work on the leg/boot relationships a little, but I'll show you the whole plan together with that improvement.

mica

  • alembic
  • Senior Member
  • *
  • Posts: 10595
(x) Wood Positioning
« Reply #102 on: March 10, 2006, 12:46:58 PM »
Hi Michael,  Here's Chip's suggestions for getting the top, back and peghead out of that one big piece of wood.  For the top:  

  You should be able to see the sapwood will be avoided. I like the set of "eyes" and the pinching of the grain near the pickups and bridge.    for the back:  

  It's got those nice "pinches" again.     And for the peghead:  

  It's got all the neat characteristics of this wood crammed into one area. We'll cut both the front and back veneers from the same part.    Let me know if these placements look good to you, or if you've got some other ideas.

mica

  • alembic
  • Senior Member
  • *
  • Posts: 10595
(x) Wood Positioning
« Reply #103 on: March 14, 2006, 12:41:33 PM »
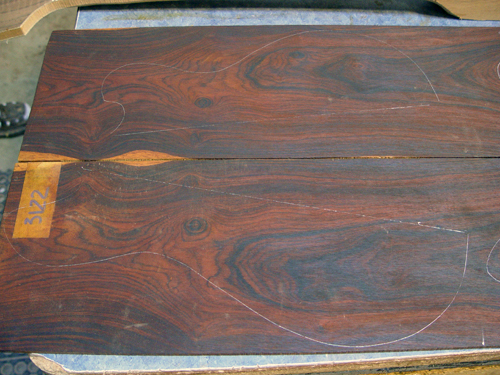
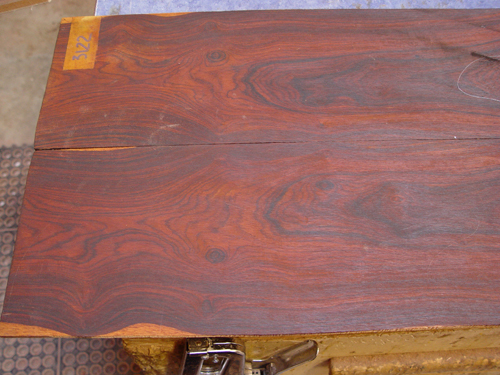
Hello there, Michael!  Here's the remarked pieces:   Top:
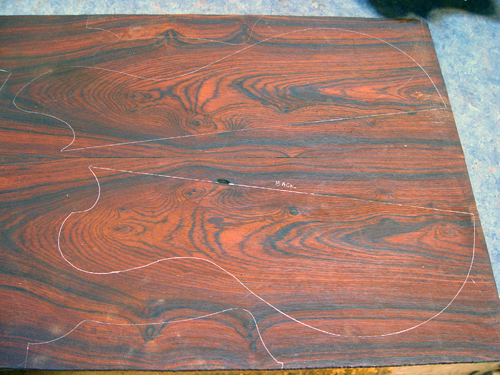
     Back:

    Only way to get the peghead out of the same board with this placement is by bookmatching the front:

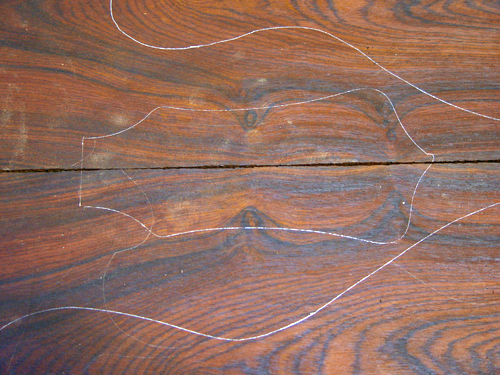
 Which would actually look a little cooler since the center will get sanded away, bringing the pinches in closer.     If you want to get a non-bookmatched peghead with simlar placement, this is about the only other choice:

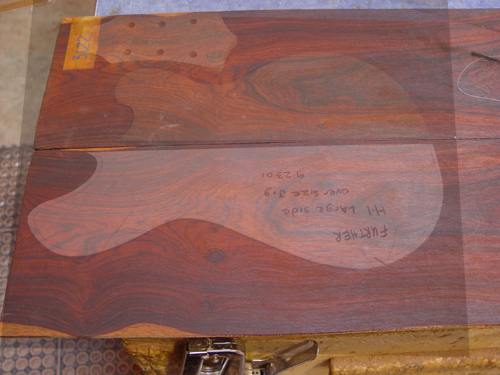
 Note, this is a really quick Photoshop bit. The perspectives don't exactly match, but it should give you a rough idea. If you prefer to view it in your mind's eye, here's the two files:  


  We are probably on the phone discussing this by now.

bsee

  • club
  • Senior Member
  • *
  • Posts: 2658
(x) Wood Positioning
« Reply #104 on: March 14, 2006, 01:00:09 PM »
Awesome - I so wanted a bookmatched peghead.  Go for it!