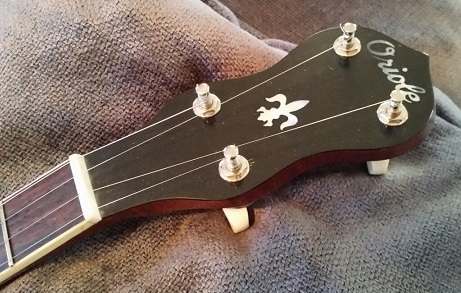
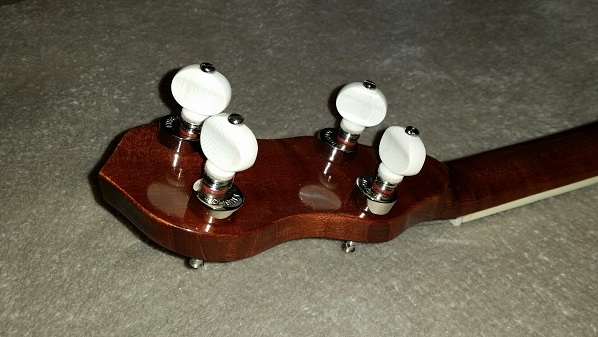
Winding down to the end now? After final wet-sanding and rub-out late Friday night, Dad came over Saturday morning for final assembly of the Oriole. First, the tuners had to be mounted on the now finished headstock. They?ve already been fitted prior to the finishing process, so the wood is already compressed where they will go. These are vintage reproduction pegs, made to closely resemble the Grover ?pancake? pegs of the day. The nice thing about assembling (or disassembling) a banjo ? a couple wrenches is all it takes. All the critical fitting has already happened, so all there is to do now is put all the pieces together. Very much like a standard Fender bass in that regard. One thing Dad is a stickler for in assembling a banjo ? never-never-never-ever put one in a bind by over-tightening the co-ordinating rods that secure the neck to the shell. Some folks will use these to lower or raise the string action by compressing the wood shell. That?s not how that?s done, and it will eventually warp and potentially ruin a shell. Anyway, here?s some sparklies?
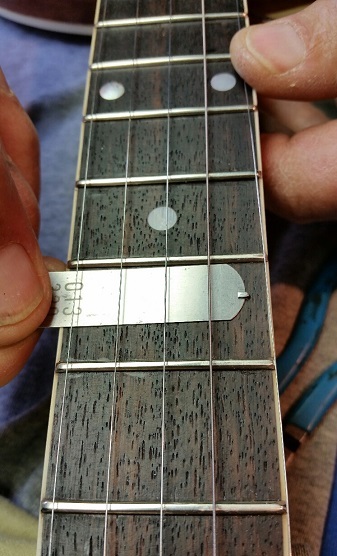
Here?s Dad installing the railroad spikes Forest mentioned a couple days ago. They really are model railroad spikes, but they make a fantastic fifth string capo. See, the top string (called a chanter sometimes) on a banjo only goes to the fifth fret, so when you capo to the second fret, the fifth string has to be capo?d two frets up as well. There are a few ways to do this, but this way is generally preferred. Trick is to drill a tiny pilot hole first, then press the spike in with a (also tiny) pair of pliers. We also will put a drop of CA glue on the spike to bind it in place. Once pressed in, we use a 0.013 feeler gauge and gently seat the spike to proper clearance. Why 0.013 - well, a regular fifth string is 0.009 ? 0.012? it?s also important the top of the spike not be higher than the crown of the frets it?s between. (hint ? sitar effect not considered cool in banjo circles... for whatever that's worth) You can see here, I?ve filed off the top of each one, and smoothed with 600-grit sandpaper, as sharp edges here would be extraordinarily bad.

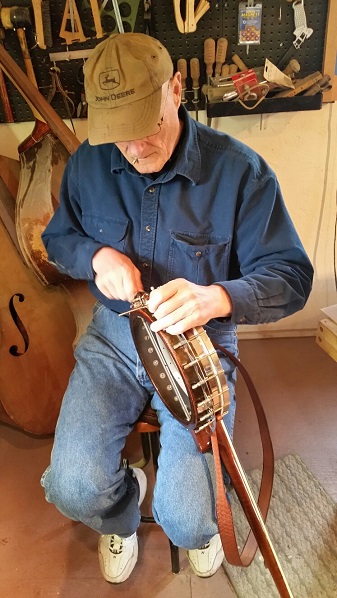
Almost done here? Though the nut slots are roughed in, I like to cut them to final depth during final setup. The bridge on a banjo is ?floating?, so setting the intonation is as simple as sliding it fore and aft until it intonates. Dad uses the 12th fret harmonic to get close, and the 19th fret harmonic for accuracy. He uses only one string, since a banjo?s standard tuning is an open G, producing a bunch of sympathetic tones, it?ll drive you crazy trying to hear just the ones you need. So skipping ahead, Dad brought a new leather strap ? he?s fastening it to the bracket hooks for proper length here.
Then? it's finally time to PLAY IT!
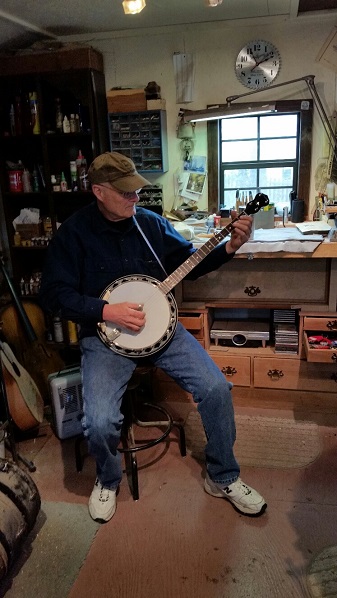
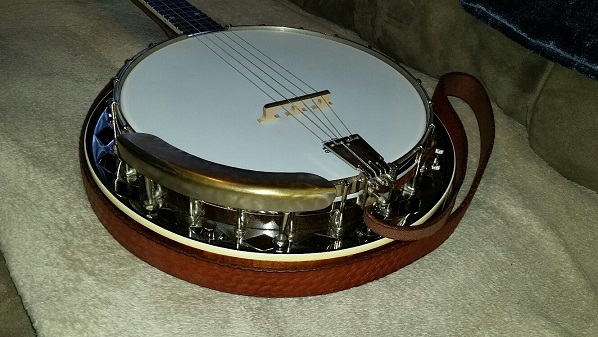
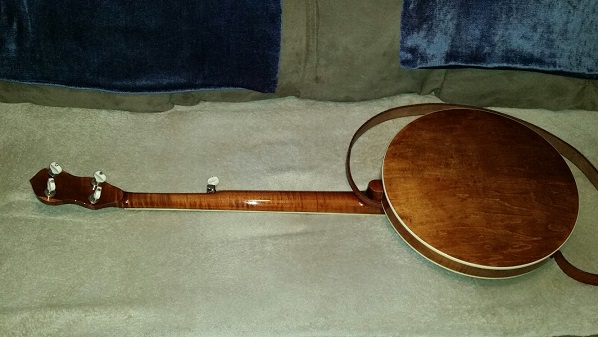
A few more small adjustments and we?re calling this one - DONE Here?s a couple more finished pictures on the sofa. Notice the rest of the hardware? that armrest is the period-correct real-deal, straight from a junk drawer full of old Gibson parts. The tailpiece however, is a Waverly, an exact reproduction of the original except made for a five-string. (remember, this was a four-string) Dad?s tooled leather strap looks good against that coffee color, and the old nickel hardware polished up nicely.

That?s about it for this one. Not sure what we?ll tackle next? there?s quite a backlog, plus my basket-case upright bass repair is way behind too.

